Creating a model railroad layout is a journey filled with creativity and craftsmanship. As I embarked on this exciting endeavor, one of the most thrilling challenges was shaping the terrain. In this blog post, I’ll take you through the initial stages of building a majestic mountain for my N-scale model railroad layout, and you’ll see how important it is to have a vision.
Choosing the Right Base Material
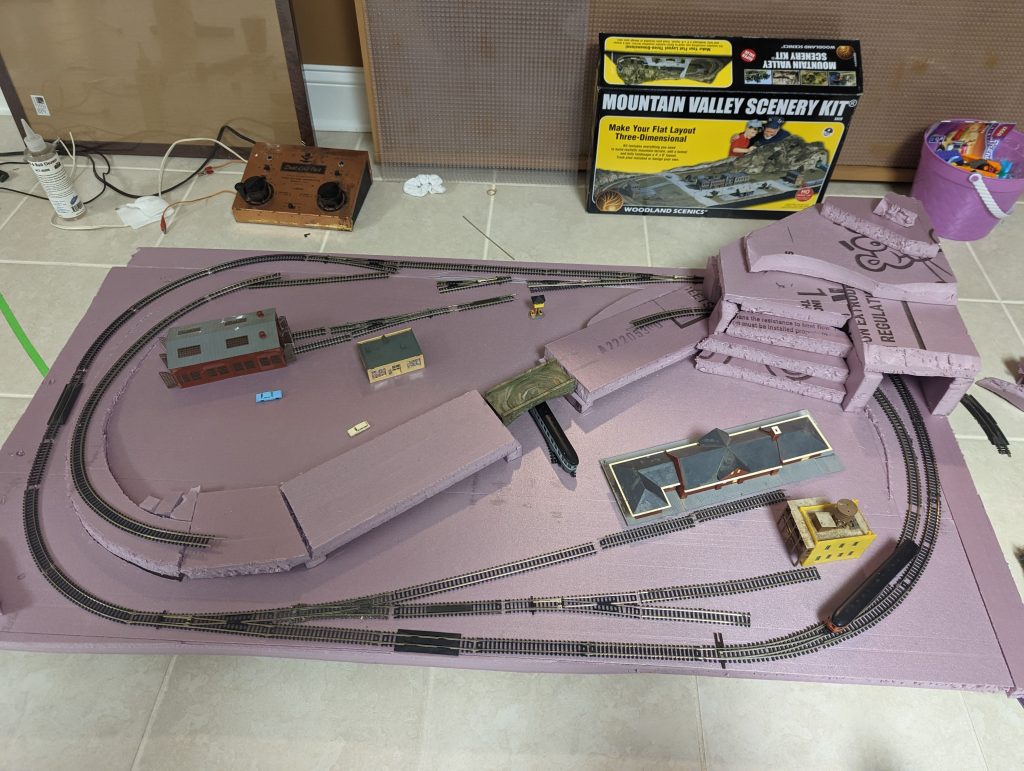
Before I could begin crafting the mountain, I had to make an important decision regarding the base material. Foam was my top choice for several reasons. It’s lightweight, easy to work with, and allows for as much detail as you can muster. I opted for the pink insulation foam easily found at the big-box hardware stores, which can be purchased in various thicknesses. I did purchase a starter kit to help stock material like plaster, various grasses, molds, etc. You can see it in the background below. There is an older technique for building mountains using cardboard, plaster, and cloth, but after seeing foam used successfully in many online layouts, I was sold.
Planning the Mountain
It’s important in many aspects of life to have a vision. Personally, I’m a big fan of Arnold Schwarzenegger, and he speaks extensively about this topic, so I’m unqualified to cover it half as well as he has in various formats. But before you can make progress on your layout, you must have a mental model of what you want to do. We’ve already covered an overall track plan and the importance there, but even for each feature and sub-area, picturing the final product in your mind will make the completion that much faster. I knew from the beginning that I wanted a mountain in the rear corner with a tunnel cut through the center. This pre-planning allowed me to visualize the mountain’s size and shape, ensuring it seamlessly blended into the overall scenery.
The Cutting Process
With my foam board ready, I began the process of cutting and shaping the mountain. This stage required precision and patience. Here’s how I tackled it:
- Creating the Base: To achieve the mountain profile and ensure stability, I started by cutting a foam base in the desired size, while leaving spacing to the track to ensure cars wouldn’t be too close to the inside of the tunnels. In a case like this, it’s important to test the longest cars you have as they can overhang the track more. In my case, I was testing some passenger cars which were quite long (albeit unrealistic for this layout).
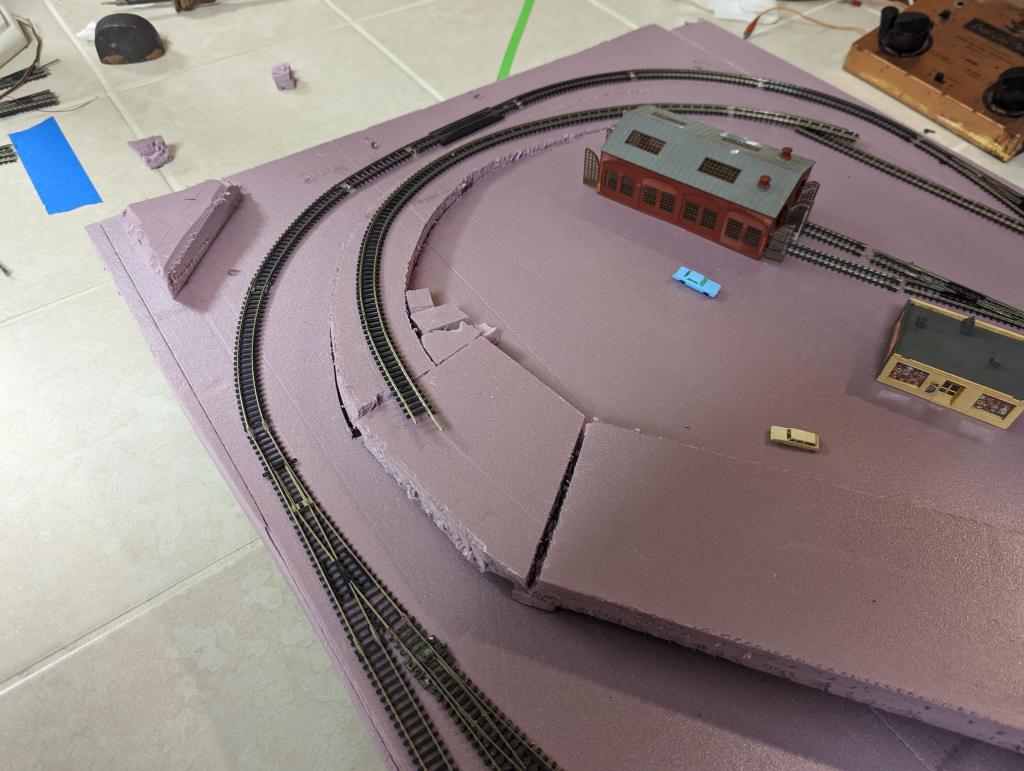
- Layering the Foam: Building a realistic mountain involved layering multiple sheets of foam. I started with a rough outline of the mountain, cutting each layer slightly smaller than the one beneath to achieve a gradual incline. You can see the effect on the above picture.
- Tunnel Opening: It was important to do research to find comparable mountain examples on other railroads, in order to determine the desired final outcome. I’ve found Youtube videos and model railroad forums to be the most helpful for research, but even Google image search can prove valuable. I used foam vertically to form the main tunnel structure, with one long piece along the entire outside and a few pieces to create a curve on the inside.
- Shaping: Mountains aren’t perfectly smooth; they have crevices, cliffs, and rock formations. I cut the various layers at different angles and spacing to achieve an uneven and more natural look.
- Safety First: Throughout the cutting and shaping process, it’s important to prioritize safety. A sharp blade is required to accurately cut the foam which can easily slip and cut yourself. There are also hot foam cutting tools which can avoid the need for sharp instruments and allow for finer control of the shape, though I do not yet have one.

Other Progress

In addition to working on the mountain, at this point, I was satisfied with the bridge approaches and ready to secure them. If you’re pursuing a prototypical layout, I wouldn’t suggest such a steep grade as I have here, but I mainly view this as a fun test layout, so I’m okay with the situation. The most important thing was to test that the engine I have can actually pull some freight cars up the grade, which it was able to; that was perfect for me.
To secure the foam together, I’m using a latex caulk commonly used for windows and doors, made by DAP. A little goes a long way in most cases, and once the caulk is laid, I simply put down some weights to hold the pieces in place while drying. You can see below I also cut out a few smaller pieces of foam to round out the hill.
Conclusion
Building a mountain for my N-scale model railroad layout has been fun but messy, with a need to always keep a vacuum nearby after each cut. The initial stages of shaping the foam have already given the layout a 3D look, bringing it one step closer to my final vision. As the layout begins to take shape, it becomes clearer how and where you can add details for a realistic outcome. Now that I have the general shape, next I intend to use plaster to create the final, more detailed state. Stay tuned to follow my progress as I bring this miniature world to life, one scenic element at a time!
